

This post was originally from designadobe.wordpress.com, a website created for a basics to WordPress and Joomla course at Chestnut Hill College, PA.
Adding lines to a design in InDesign is just as important as the corners you use for those lines. Corners for a simple design in InDesign can add a more person touch or add something that will make it pop! InDesign delivers several different options for corner designs, so let me go ahead and show you what they are and how it’s done.
TYPES OF CORNERS
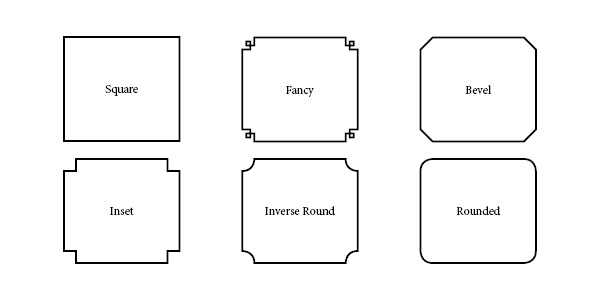
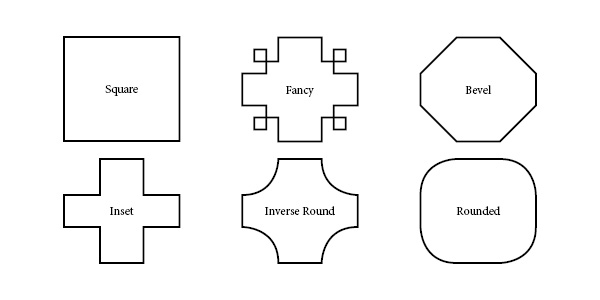
InDesign offers six different options for corners: Square, Fancy, Bevel, Inset, Inverse Round, and Rounded, all pictured below (click the image to make it larger).
Each are easily accessed, and you can combine more than one on a square as well. Follow along with the rest of this post to find out!
MAKING THE SHAPE
First thing you need to do in InDesign is create a square, text box, or an object with a corner. Here are some easy steps (if you know how to do this than you can skip to the next section).
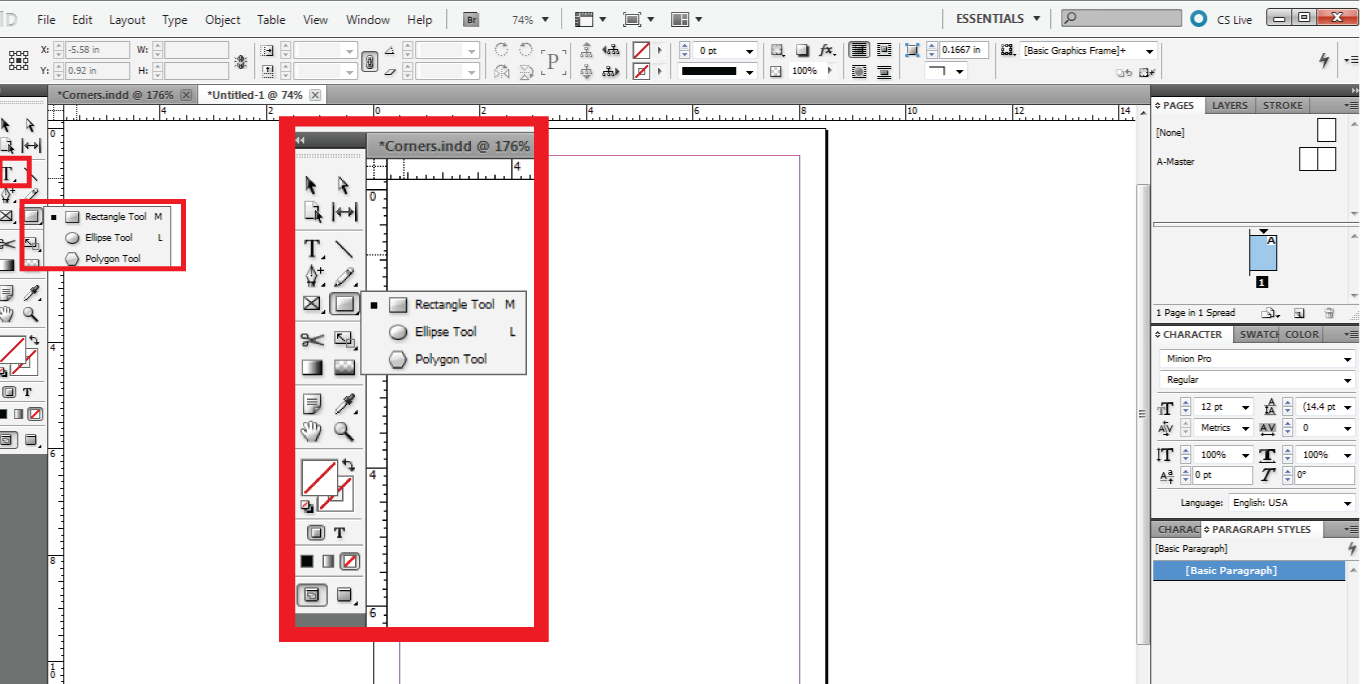
- Use the rectangle tool (shown below) to draw a rectangle. OR click on the “T” tool to create a text box (shown below).

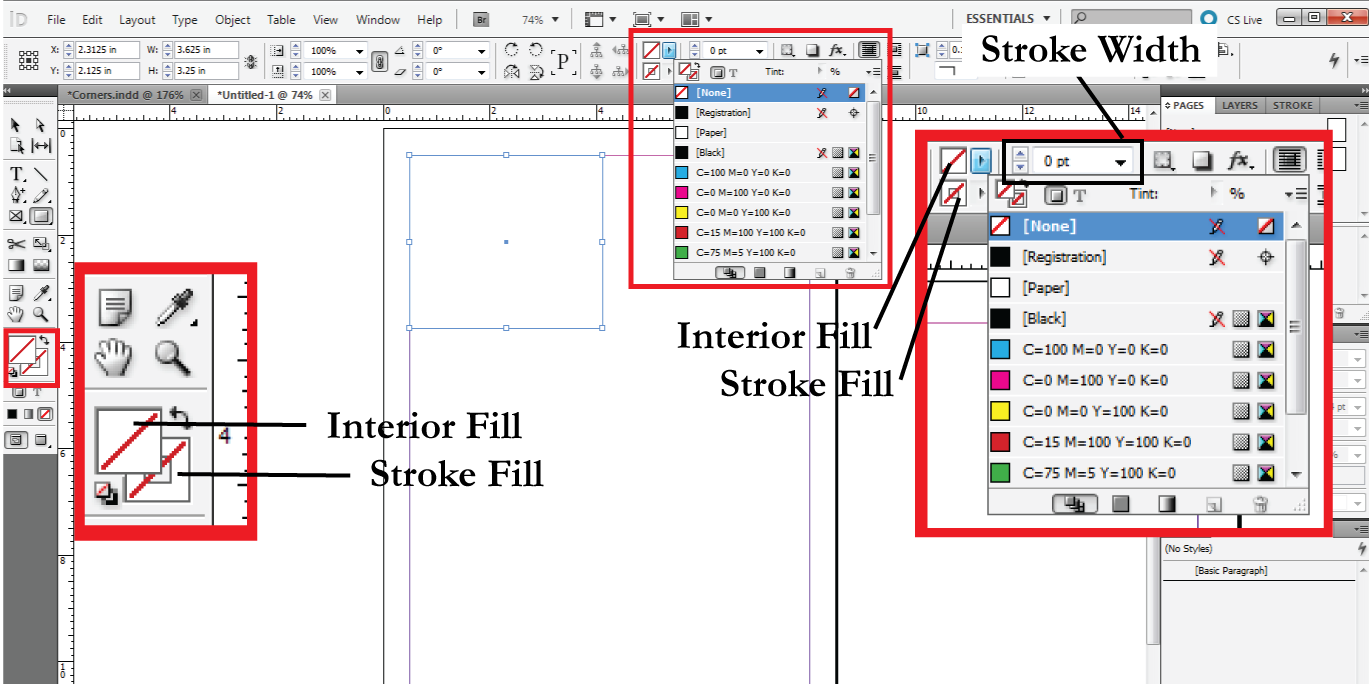
Options for Creating a Text Box or Rectangle - Next either add color to the shape or a stroke line around it. To do this you have two options:
- The Control Panel (shown below), which offers you preset colors
OR - The Fill Tools on the Tool Panel (shown below), with the fill tools on the Tool Panel double click to choose your color
Make sure you chose whether you would like to fill the rectangle or to just add a stroke to do this select one of the two fill options by clicking on said option (this is delineated in the photo below).
- The Control Panel (shown below), which offers you preset colors
- If you added a stroke use you can increase the stroke width in the area shown below by typing in the width you desire or by using the arrow buttons. Typically a 1 through 5pt line is sufficient in a design.
Now you are ready to add corner effects to your rectangle!
ADDING THE CORNER EFFECT
So how to you access the corner options? There are two different approaches.
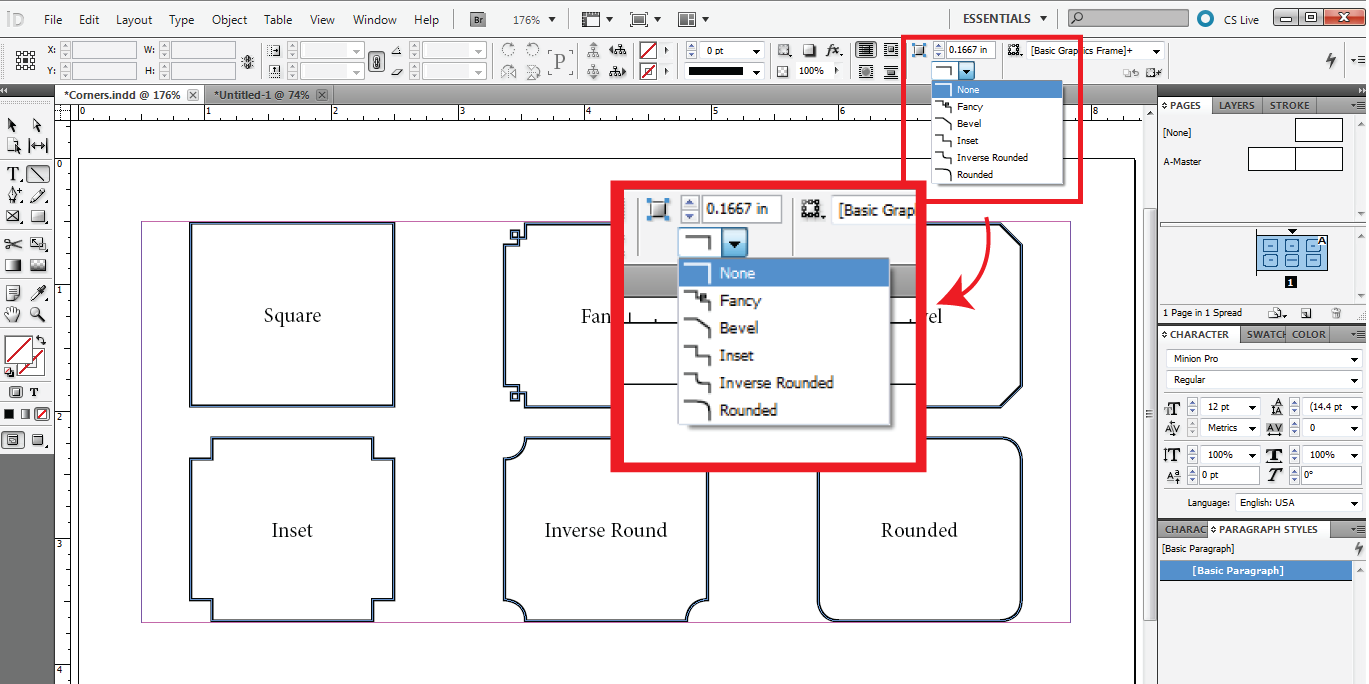
- The Control Panel Drop-down (shown below) enables you to change the corners of any rectangle, text box, or cornered object. However, each corner will be the same.
You can access your corners through the control panel. OR
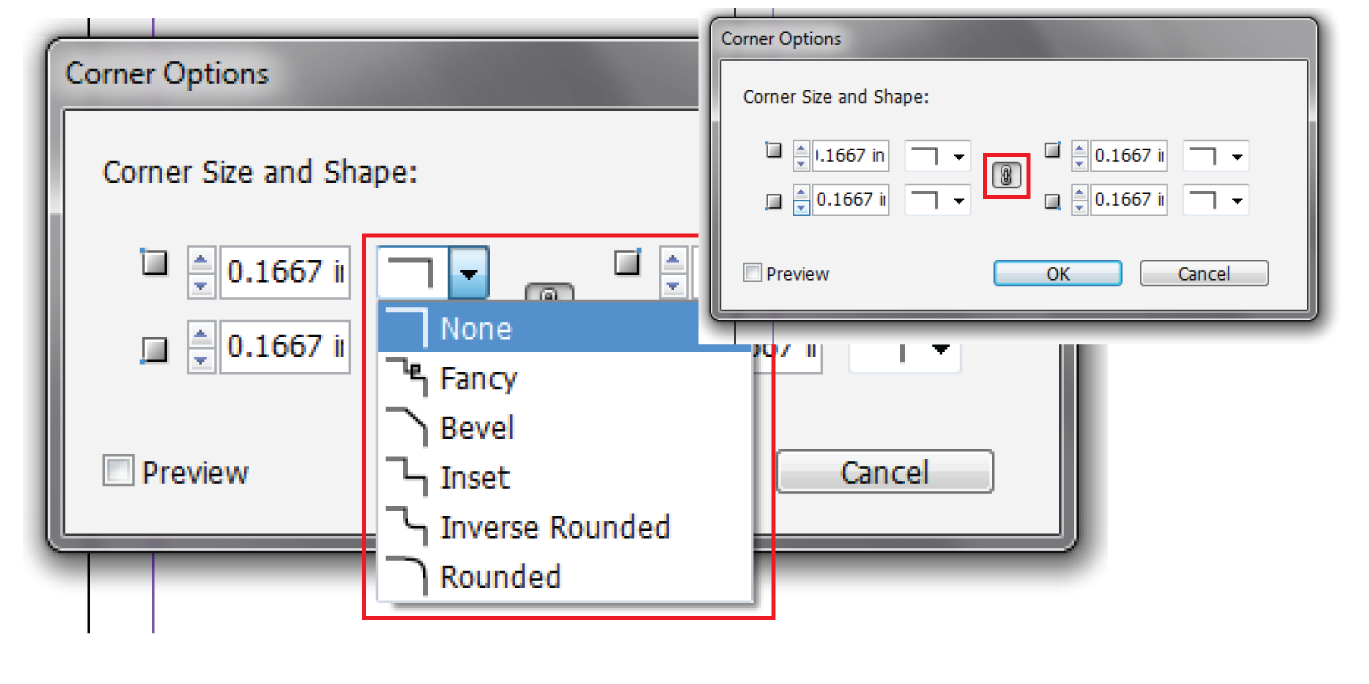
- Through the Object Menu and select Corner Options (shown below), a pop-up screen called Corner Options (shown below) will then appear letting you choose a corner for each available corner on your object.

Accessing the Corner Options 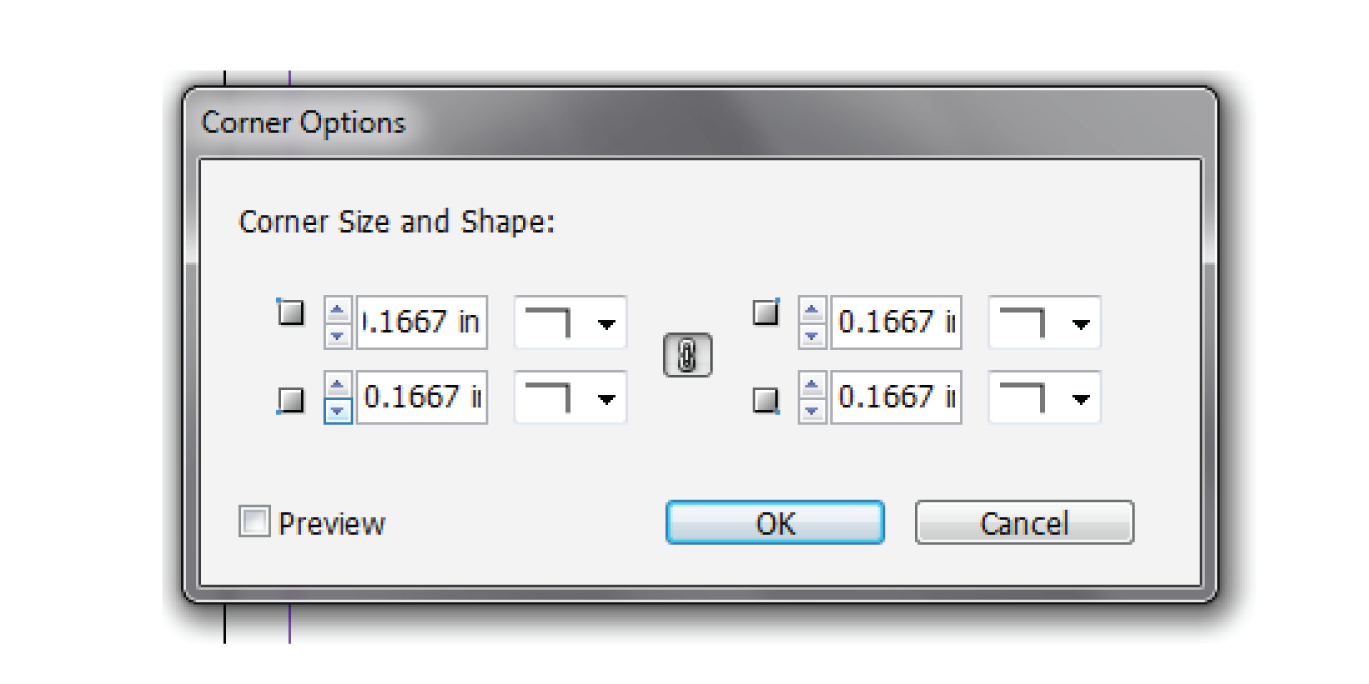
The Corner Options box gives designers many more options.


Now choose which corner you would like! See above (the first image) for a picture of each of your options.
FORMATTING THE CORNER SIZE
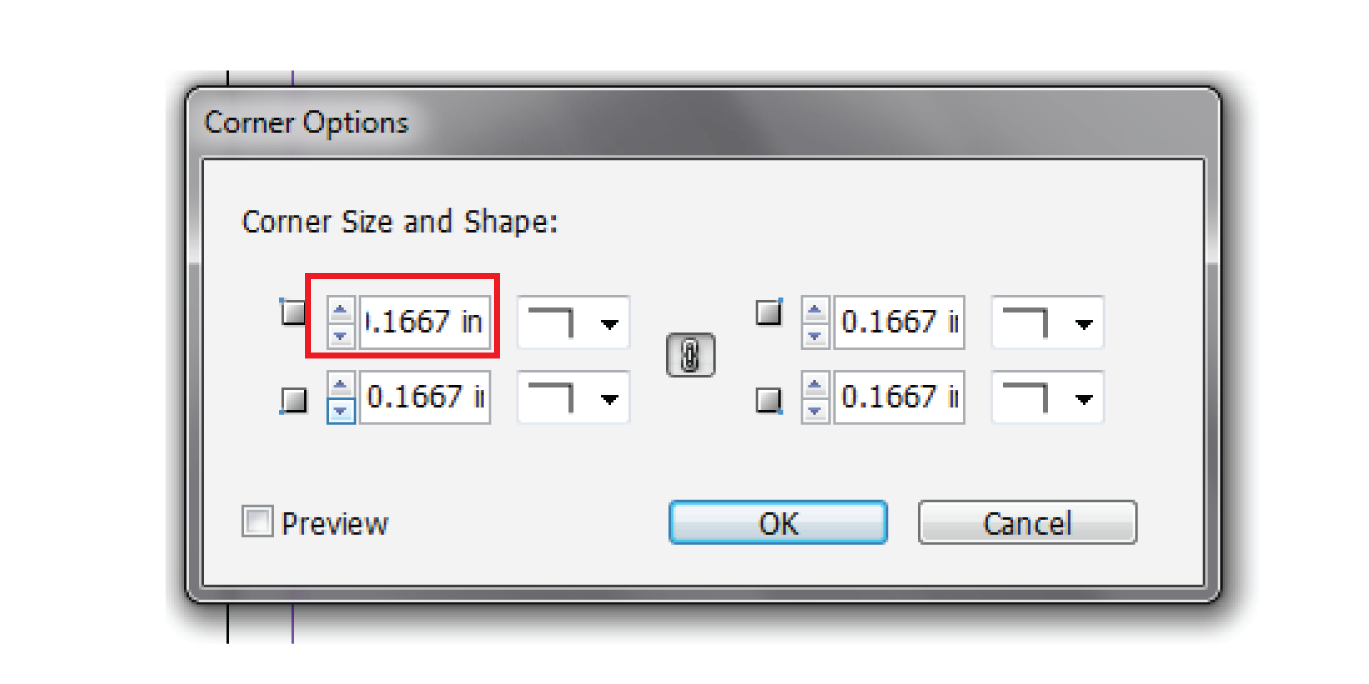
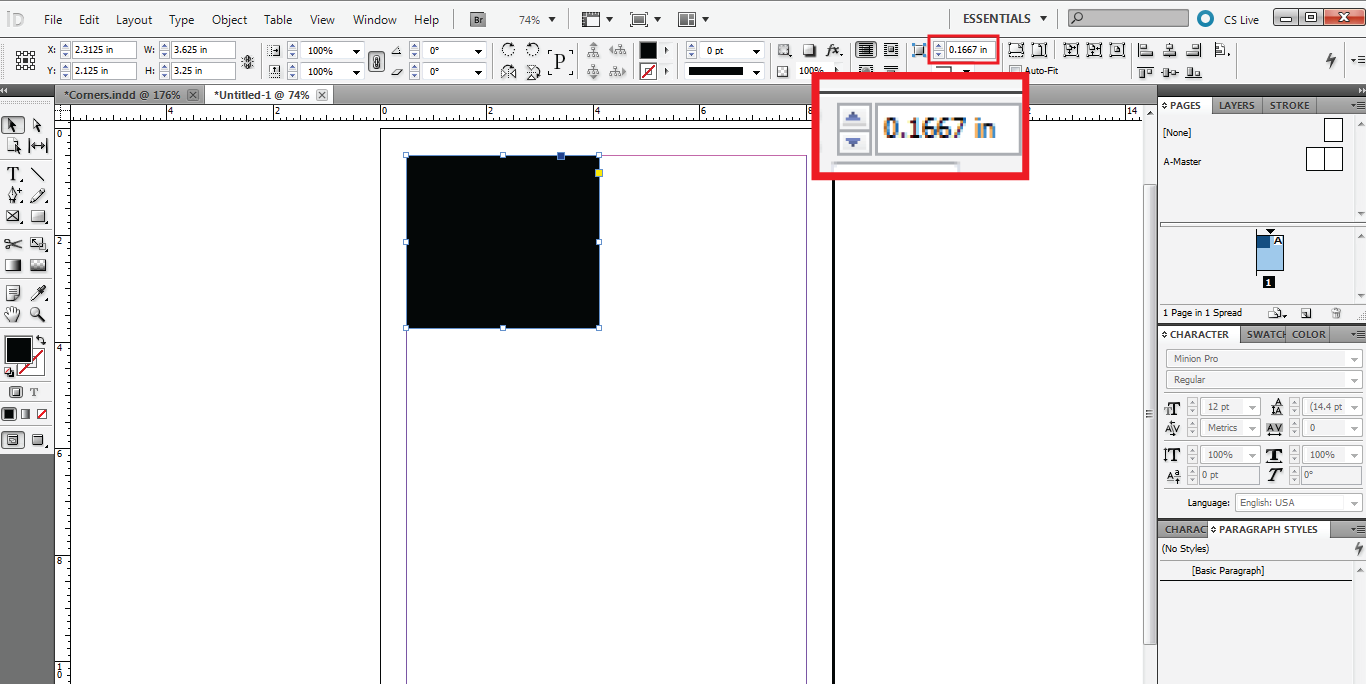
The Size of the Corners can also be adjusted, and can also change the look of your design (see below).
To do this change either the sizing listed next to the corners in the corners options box, or on the control panel (see below). On the control panel the sizing option is above the corner, and will be effective for each corner.
FORMATTING A SHAPE WITH TWO OR MORE CORNERS
Shapes can also have more than one corner design. To do this you need to use the corner options pop up that is accessed through the Object Menu bar and then by clicking Corner Options. After doing that you must unclick the little chain link in the center of the pop up to change the corners individually. From there you can use the drop down list to change each of the corners.
Here is an example of a rectangle with the different options discussed here included!